
Part 1 – BOM and frame
Having looked into building a quadcopter some time in the summer, I was put off by price. But after now seeing a couple in person and the amazing footage they can produce, I decided to give the world of multirotors a whirl!
I got the idea of a hexacopter into my head simply because if they have two more blades they must be 50% more awesome? Right?
I have not even started the build yet, but just researching and ordering the parts is making me think they are just 50% more money… We will have to wait for the end result on that one.
After a quick chat to some other multirotor guys on IRC, I picked up a cheap Hubsan X4 with some spare nectar points to practice my crashing. This was probably worth the money as flying a multirotor takes a little bit of getting used to after flying cheap helicopters.
This is what I have ordered so far for the build (Pretty much up to date):
| Part | Quantity | Price (GPB each) | Description |
|---|---|---|---|
| H550 V2 Frame | 2 | 13.60 | Hex frame (+1 spare of everything) |
| NTM Prop Drive 28-26 1000KV Motors | 7 | 10.55 | 1000rpm/volt motors (+1 spare) |
| Turnigy plush 30A ESC | 7 | 8.67 | Hobbyking own brand ESC (+1 spare) |
| NTM Prop Drive 28 Series acc pack | 7 | 1.25 | Motor and prop mounts (+1 spare) |
| GWS 9×5 Propellers | 10 | 2.50 | 3 CW and 3 CCW props (+ spare sets, you will need them!) |
| Sevo leads (10pk) | 1 | 1.68 | These look like extenders and the APM comes with connecting leads, so not sure why I got them! |
| HKPilot Mega 2.5 | 1 | 50.02 | Ardupilot mega clone (remember to stick foam on the barometer!) |
| uBlox NEO-6 GPS | 1 | 11.87 | I already had a MAX-6 breakout, but finding the lead to plug it into the APM was hassle, plus this one has a battery backup. |
| Turnigy 9X transmitter/receiver | 1 | 35.52 | Very cheap, I fancied the 9XR but adding the TX and RX modules was getting expensive. Do that if you have the cash. LCD upgrade. |
| PolyMax 3.5mm connectors | 2 | 1.21 | Connect motors to ESC’s |
| HXT 4mm connectors | 1 | 2.79 | Connect battery to frame’s power distributor. |
| Turnigy 5000mAh 4S 25C Lipo | 2 | 23.52 | Should last just under 10mins without load. |
| HKPilot power module | 1 | 11.59 | Seems a bit steep for a 5v PSU, plus we are going to demolish that 90A current limit at peak. But oh well… |
| Lipo low voltage alarm | 1 | 1.37 | Cheap and better than a forced landing (crash) |
| HKPilot mounting box | 1 | 3.78 | At 3.78 it beats 3D printing one. |
| Prop balancer | 1 | 0.93 | Someone said this was a good idea. at 93p who cares! |
| Telemetry Kit | 1 | 19.79 | Will be handy to find the thing + debug if (when) it crashes |
| Lipo Charger | 1 | 15.17 | This would be about £100 knowing my local hobby shop… |
| Lithium Polymer Charge Pack | 1 | 2.18 | |
| Turnigy Pure-Silicone Wire 10AWG | 2 | 2.06 | Black and red |
| Anti-Vibration foam | 1 | 0.97 | This was great for mounting the APM (used 4x 10x10mm squares). Can also be stuffed in anti vibration bulbs to stiffen them up. |
| Rhino 2620mAh 3S Transmitter Lipoly | 1 | 10.56 | |
| Crappy landing gear | 1 | 14.90 | Dont buy this. Please. Get something better. |
| Gimbal | 1 | 30.99 | Basic gimbal with motors. |
| EvvGC Gimbal Controller | 1 | 18.36 | This is fairly good. Takes a bit of tweaking and tuning but its pretty open for hacking! |
| GoPro Hero 3 Silver | 1 | 199.00 | For the money I feel the software on this is horribly unreliable. My first camera had a black band accross the video (perhaps due to vibration) but they replaced it. Good customer service I must say. |
| FPV Tx/Rx | 1 | 32.99 | |
| 3.5″ LCD | 1 | 11.82 | |
| Eco FPV goggles | 1 | 12.40 | + Deluxe set. Makes a fair poor mans setup. |
| MinimOSD | 1 | 9.36 | Some people seem to blow these up a lot (one guy has “blown up” 7.. lol). Just watch what you are doing. The main problem I had was the 5 pin connector this came with going onto the 6 pins.. Seems simple but I had Green connected to “GRN” and that was apparently wrong… <3 China |
Now there are a few things on here I could probably do without… And I have ended up spending way more money than I first planned.
Reason 1 behind this is the shipping worked out to be about £45 with SCS Express (who suck by the way)
Reason 2 is SCS Express were then kind enough to invoice me a few days later to pay some VAT (HK post usually just try their luck). So fair enough, I paid. But they have also slapped a stupid charge on top of that… Their english is awful and I spent about 2 hours deciding if the “VAT Invoice” was spam or not due to their shoddy formatting.
It would have been nice for hobbyking to be a bit more upfront about these charges. After reading on the forum it looks like the common thing to do is tell HK that you do NOT want to use SCS-Express when you order. Lesson learned.
My H550 frame came from hobbykings UK warehouse which worked out okay, despite having to deal with the dreaded parcelfarce and royal fail.
My other frame was from ebay, which i ordered first as hobbyking were out of stock at the time.
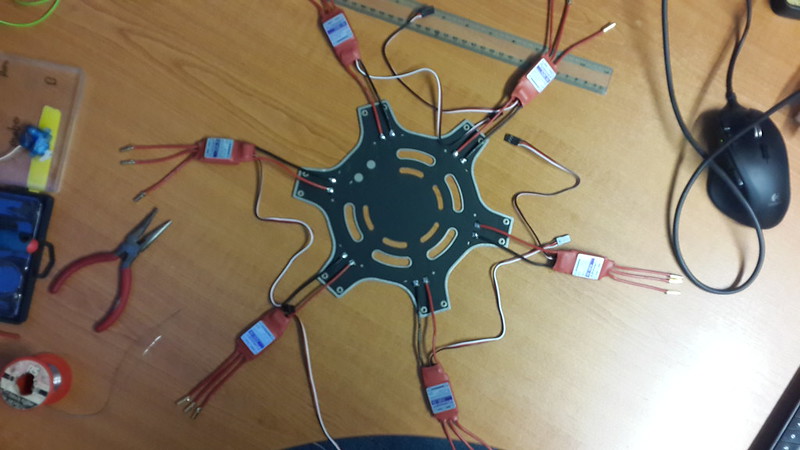
Here it is assembled:
![11252651323_f73a2651c4_b[1]](https://chris-stubbs.co.uk/wp/wp-content/uploads/2013/12/11252651323_f73a2651c4_b1.jpg)
Hopefully SCS-Express will pull their act together and I will have the rest of the bits by the end of the week. Stay tuned for the rest of the build!
Part 2 – Build
My box of hobbyking bits finally turned up and I got straight to work putting the hex together. Stage 1 was to solder the ESC’s to the power distribution board. I actually ended up flashing these with the BlHeli firmware (as they have an SiLabs chip). The H550 power distribution board is also a nightmare for the magnetometer (compass) thanks to the crazy magnetic field. This can be overcome by mounting the ardupilot a bit further away (like on some foam). It worth ordering some nice flexy 10AWG wire for the battery input too.
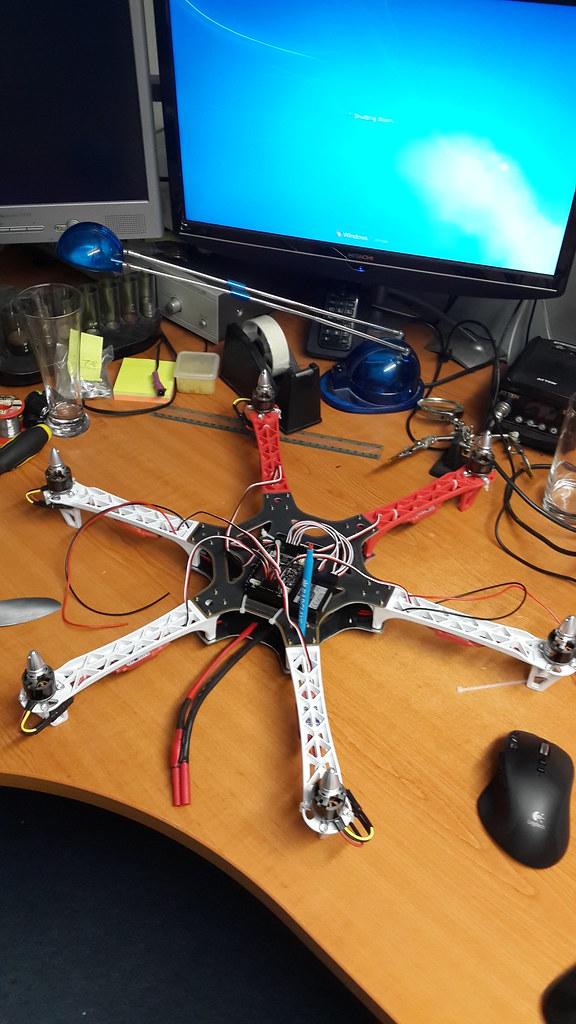
My initial idea of fixing the motors to the frame as shown below turned out to be pretty bad. One of the motors came loose, started throwing itself around and ended up breaking a prop. I picked up some M3x8 screws and mounted the motors directly to the arms in the end.

First Flight
After calibrating the ESC’s, accelerometer, compass and some extensive testing, it was time for the maiden flight.
The first flight was pretty successful. At the start I had the pitch controls backwards which threw me off. I landed and set that straight then had a pretty good flight! Altitude hold was a bit jerky (looked like it may have been oscillating a bit) and the GPS loiter was about the same.
First crash
My third flight was also the first flight I decided not to film. Things were going according to plan (with the GPS mode still a bit jerky) until I switched to return to land mode. At this point the copter threw itself forwards and broke a prop under the stress. Its safe to say even on a hex when a prop goes out you can still hit the ground pretty hard 🙁
Note the motors and broken arms stuck in the ground at the back.
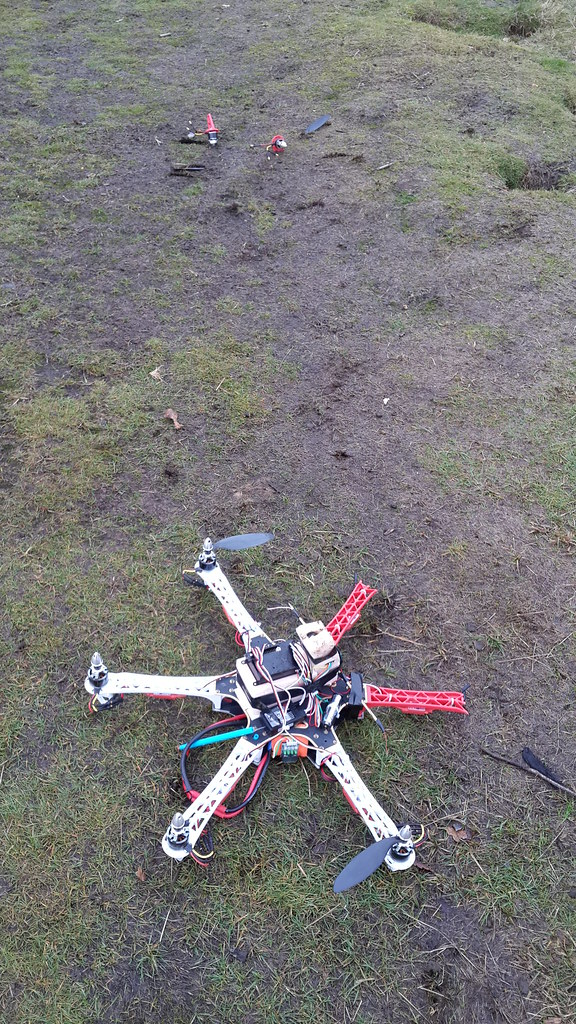
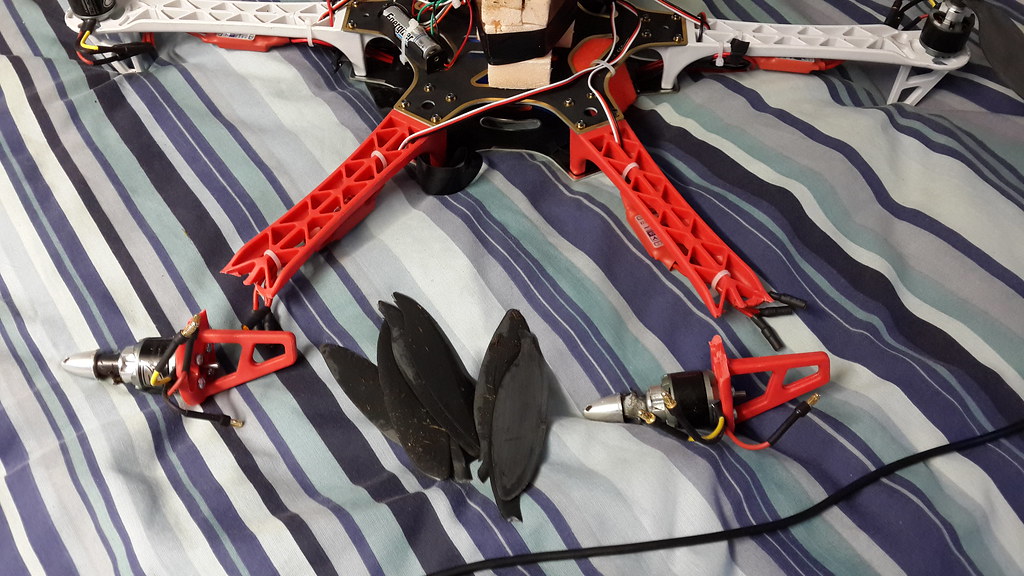
So not the end of the world. I have now decided to ditch slow fly props and get something with a bit more beef joining the propeller to the hub. Back to hobbyking for some more bits.
Rebuild
While I waited for some more bits to arrive to repair and upgrade the hex. I went ahead and flashed the Turnigy Plush 30A SiLabs ESC’s with BlHeli using the instructions here. I also added the backlight and flashed ER9X onto my Turnigy 9X controller.
Vibration from the motors was probably to blame for the oscillation before, so I used the top PCB of my spare frame and some anti vibration bulbs to create a vibration isolated platform to mount the APM and bits to. On this I mounted a fresh foam block to get it away from the PDB’s magnetic field and suspended the APM case on 4x 1/4 inch square pads of orange latex foam. This seemed to really help, along with a new 5hz gps, to keep the copter more stable.
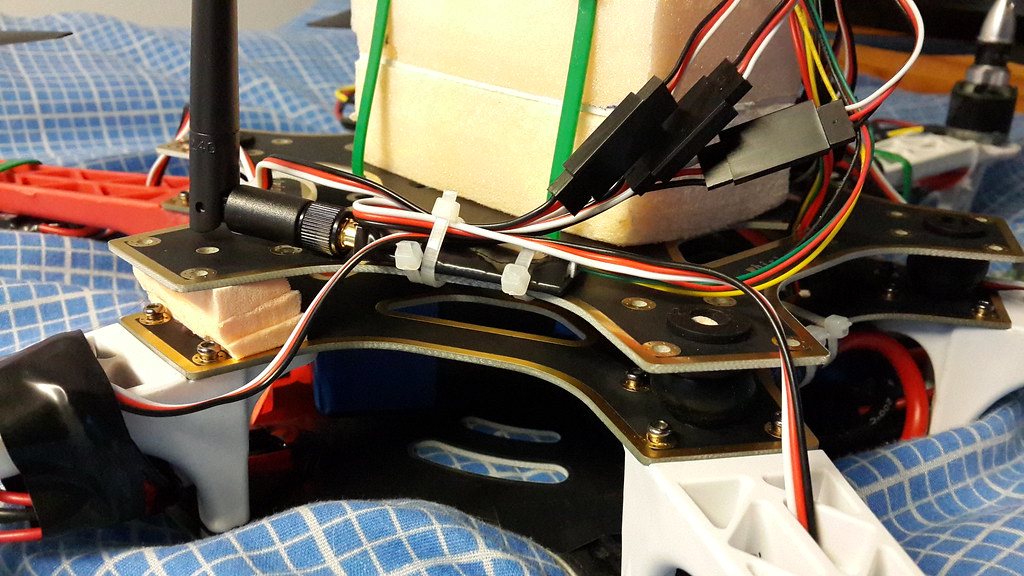


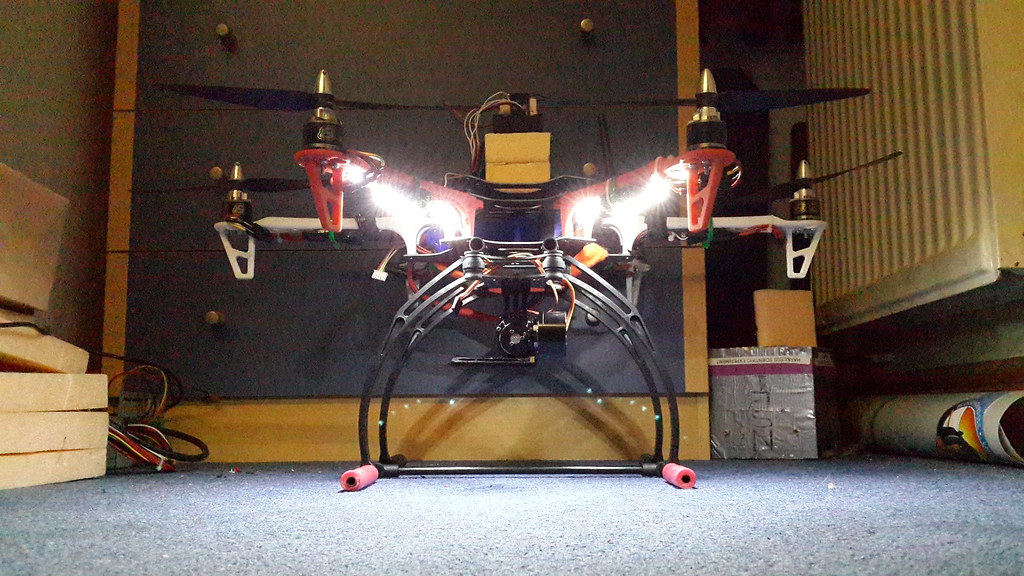
Also strapped on you will now find a telemetry transmitter, FPV transmitter, some really flimsy landing gear, LED strip and a gimbal.
First flight with GoPro
I treated the hex to a GoPro Hero 3 Silver camera. The footage from this is really nice however the firmware seems to be a little flaky. It has locked up a fair few times now transferring files and charging, requiring a battery pull to reset.
I locked off the gimbal level with some cable ties whilst I waited for its EvvGC controller to arrive from dealextreme. (note the silly gopro strap seemed rubbish and very sloppy, cable ties ftw)
EvvGC Gimbal Controller
My EvvGC 1.3 board turned up from dx.com, I am pretty happy with the service and there seems to be a few good deals on there. Thumbs up!
You currently have to use a 3v USB-TTL converter to flash the firmware onto the board, the PD values can then be tuned over USB. I played about with editing the firmware so the offset angle of the camera from the horizon is directly proportional to the RC input. This makes it a bit easier to control using a pot.
You need to set up eclipse (following instructions in the EvvGC github repo) and gcc to compile the code here. (if you just want to flash my hex file, download the repo as a ZIP and its in Firmware/Release.
The gimbal/camera/controller setup does seem to have a bit of a random twitch now again, like it forgets which way is up and just throws a tantrum. With some more tuning this *seems* to have stopped.
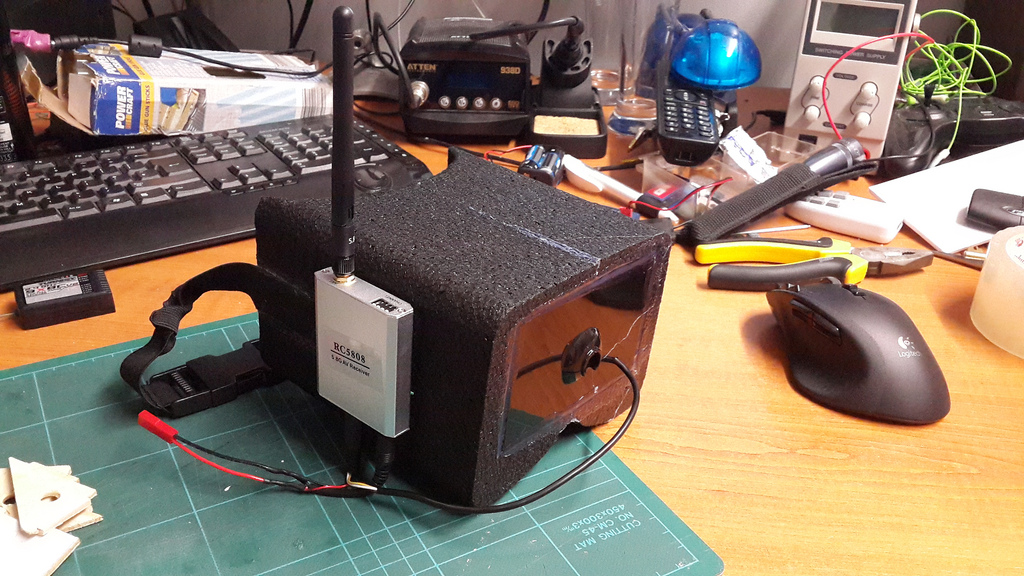
FPV Setup
To follow soon… RxTx from here: http://www.ebay.co.uk/itm/161057429739
Hi,
First off great post and great build!
I watched your video on facebook about the Evvgc gimbal controlled with pot.
I was just wondering how you did this? I have this controller with the Futaba T8J and FW 0.4, but when i controll pich with the pot on my controller, the pitch just keeps drifting.. I am totally new on this, and don´t know how to edit the FW..
Would you please be so kind to tell me how you managed this?
Thanks in advanced!
Regards
Martin
Hi Martin,
The stock firmware takes the pot input and uses that to set the “velocity” of rotation as it were, so to move the camera from looking straight ahead to looking down, you have to turn the pot one way while it rotates, then back to the center to stop it.
I modified the firmware (very basically) to translate the pot orientation directly to the angle of the pitch.
You should be able to follow the standard flashing instructions to flash the board with these files I compiled: https://github.com/chrisstubbs93/Firmware/tree/master/built-versions/0.4
Chris
Hi
I bought a used evvgc 1.3 and uploaded your changed 0.4 hex file but it did not change anything. The rc controlls only the velocity of the rotation .
I compared both files, the original 0.4 and your 0.4 firmware and they are the same. Am I uploading the wrong files ? Plz help me, i only want to controll my “pot orientation directly to the angle of the pitch” and im bit new to this whole stuff.